 Save
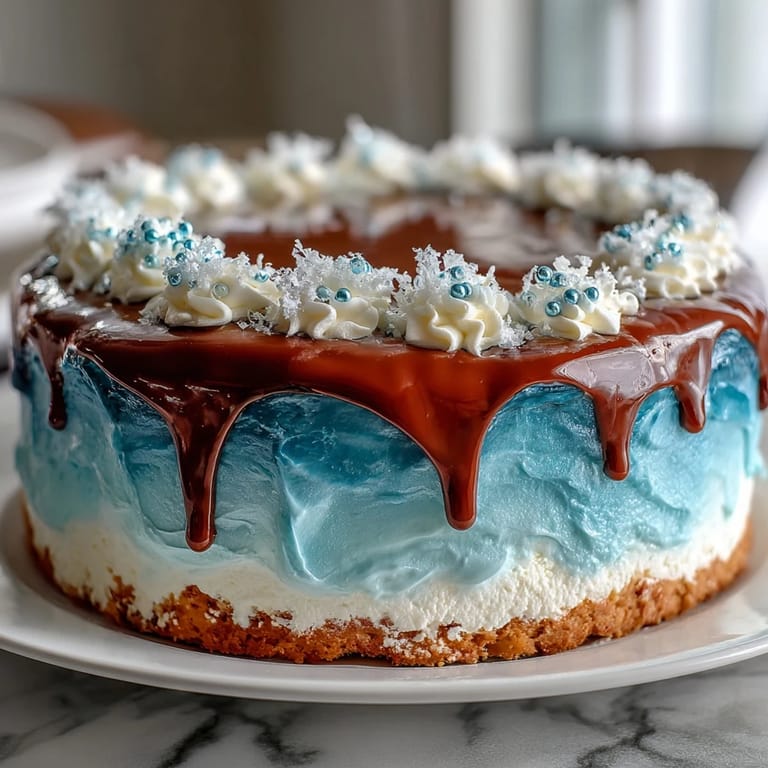
Save My friend texted me a photo of her Pisces birthstone necklace one morning, and I spent the next hour imagining what a cake for her zodiac sign might look like. I kept picturing waves of blue frosting, the kind you'd see if you were underwater looking up at sunlight filtering through the surface. By afternoon, I was in the kitchen with my mixer running, creating something that felt both whimsical and deeply personal, a cake that somehow captured her dreamy, go-with-the-flow personality in buttercream and sponge.
When I finally brought this cake to her birthday dinner, the whole table went quiet for a second, which is the best compliment you can get. Someone said it looked too beautiful to eat, and then everyone laughed because we all immediately cut into it anyway. Watching her face light up when she tasted the soft, vanilla sponge made every minute of mixing and frosting worthwhile.
Ingredients
- All-purpose flour (2 ½ cups): The backbone of your cake, and room temperature ingredients matter because they incorporate air more evenly.
- Baking powder (2 ½ tsp): This is your lift, so don't skip or substitute unless you want a dense cake that's more brownie than sponge.
- Unsalted butter (1 cup for cake, 1 ½ cups for frosting): Room temperature is non-negotiable—cold butter won't cream properly and you'll end up with a grainy texture.
- Granulated sugar (1 ¾ cups): The crystals need air to beat into the butter, so take your time with this step even if your arm gets tired.
- Eggs (4 large): Room temperature eggs emulsify smoothly into the batter without creating lumps or breaking the mixture.
- Pure vanilla extract (1 tbsp cake, 2 tsp frosting): Real vanilla makes a noticeable difference in the flavor depth, especially in something this simple.
- Whole milk (1 cup cake, ¼ cup frosting): The moisture that keeps this cake tender and prevents it from becoming dry by day three.
- Powdered sugar (5 cups): Sift it before measuring so your frosting doesn't end up lumpy and gritty.
- Blue and white gel food coloring: Gel coloring doesn't add liquid like liquid dyes do, so your frosting stays thick and pipeable.
- Edible pearls and fondant (optional): These touches turn a beautiful cake into a showstopper, but they're optional if you're short on time.
Tired of Takeout? 🥡
Get 10 meals you can make faster than delivery arrives. Seriously.
One email. No spam. Unsubscribe anytime.
Instructions
- Prep your pan and oven:
- Preheat to 350°F and line your 9x13 sheet pan with parchment paper—this step saves you from scraping burnt edges later. Greasing underneath the parchment prevents sticking from all angles.
- Combine dry ingredients:
- Whisk flour, baking powder, and salt together so the leavening distributes evenly throughout. This takes less than a minute but changes everything about your cake's rise.
- Cream butter and sugar:
- Beat for a full three minutes until the mixture looks pale and fluffy like cloud. You're incorporating tiny air pockets that will expand in the oven and create tenderness.
- Add eggs one at a time:
- This patience pays off because each egg needs to fully incorporate before the next one goes in. If you dump them all at once, you risk a broken, curdled mixture that no amount of mixing will fix.
- Alternate wet and dry:
- Start and end with the flour mixture, adding in thirds with milk in between. This technique prevents overmixing, which toughens the cake and ruins the delicate crumb.
- Pour and bake:
- Smooth the top of your batter and bake for 28-32 minutes until a toothpick comes out clean. The cake is done when it springs back lightly under your finger and smells like vanilla heaven.
- Cool properly:
- Let it rest in the pan for 10 minutes, then turn it out onto a rack to cool completely. Frosting a warm cake is a disaster waiting to happen—the frosting will melt and slide right off.
- Beat butter until creamy:
- Take two full minutes here, really getting air into the butter before you add sugar. This foundation determines whether your frosting is light and fluffy or dense and greasy.
- Build your frosting:
- Add powdered sugar gradually on low speed, then increase to medium and beat until smooth and spreadable. Add vanilla and milk last, adjusting consistency until it's thick enough to hold a peak but soft enough to spread.
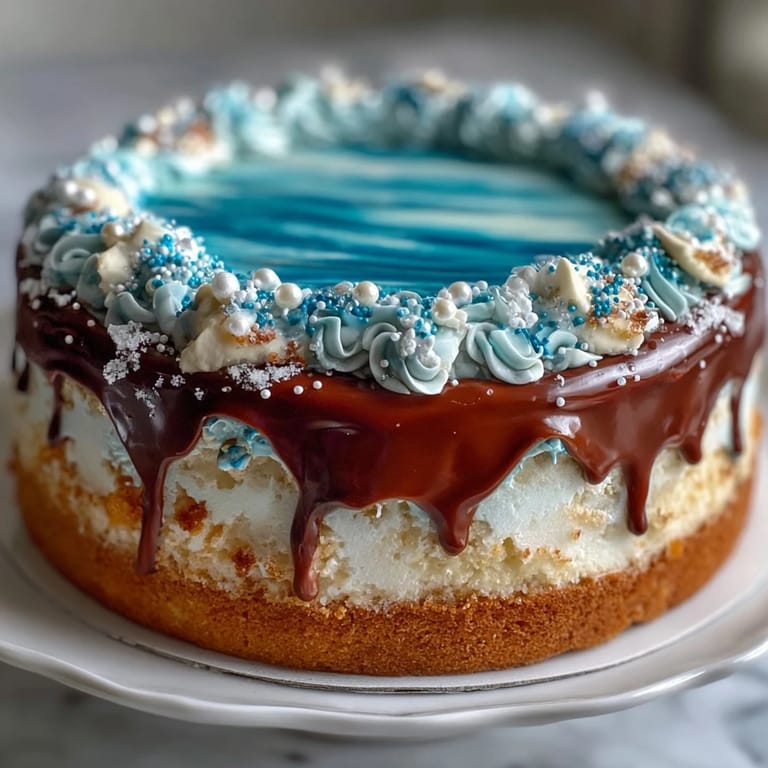
- Create your blue ombré:
- Divide frosting into 3-4 bowls and tint with varying shades of blue, keeping one white. I like deep ocean blue at the base, transitioning through medium blue to pale aqua and white at the top.
- Apply the crumb coat:
- Spread a thin layer of white frosting all over the cake and chill for 20 minutes—this seals in crumbs so your final frosting looks clean. It feels tedious but the payoff is a professional-looking cake.
- Layer waves with intention:
- Using an offset spatula, start at the bottom with your darkest blue and sweep upward in swooping, organic wave motions. Let the colors blend slightly where they meet, creating that natural underwater gradient.
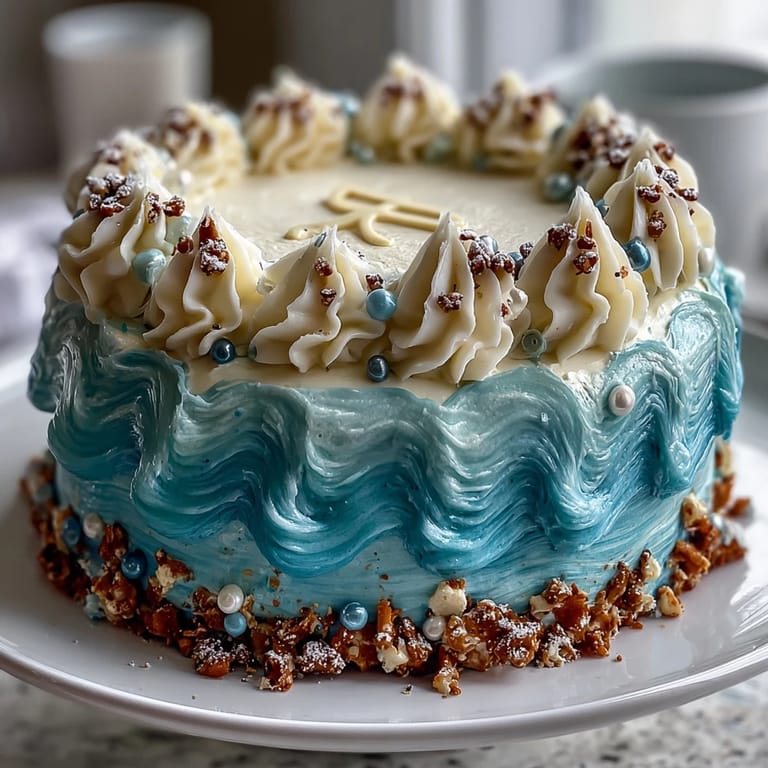
- Add sea foam on top:
- Pipe or swirl white frosting across the top to mimic foamy ocean waves breaking on the surface. Keep it loose and natural-looking rather than perfectly uniform.
- Optional finishing touches:
- Scatter edible pearls for shimmer and add a Pisces symbol made from white chocolate or fondant if you want extra magic. These details aren't necessary but they do make people stop and stare.
 Save
Save There's something magical about baking a cake for someone's birthday that connects to their identity, even something as personal as their zodiac sign. This cake became a conversation starter, a little edible art piece that somehow made the celebration feel more thoughtful and intentional.
Why the Ombré Matters
The beauty of an ombré frosting effect is that it tricks your eye into seeing depth and movement where there's really just color gradation. I learned this the hard way when I first tried blending colors too much—it looked muddy instead of oceanic. Now I keep them slightly separate, letting them just kiss at the edges so each shade stays distinct but the overall effect feels like a gradient.
Sheet Cake Advantages
Sheet cakes are underrated because they're actually easier to decorate than round layers and they feed more people with less fuss. There's no stacking or leveling involved, just a blank canvas that's perfect for this wave design. Plus, the larger surface area means more frosting to work with, which sounds like a dream when you're practicing your swooping technique.
Make It Your Own
The beauty of this cake is how easily it adapts to your taste or schedule. You can bake it a day ahead and store it covered at room temperature, then frost it whenever you have time. Some people add lemon zest to the batter for brightness, others stick purely vanilla, and honestly both versions are wonderful depending on your mood.
- Try adding the zest of one lemon to the dry ingredients if you want a subtle citrus note that plays beautifully with the vanilla.
- Chill the entire frosted cake for at least an hour before serving so the frosting sets and the flavors meld together.
- Serve with sparkling water or a light Moscato if you want to be fancy, or just grab milk like a normal person.
 Save
Save This cake proves that desserts can be both simple and stunning, casual enough for a weeknight effort yet special enough for someone's birthday. Every slice reveals that moist, tender sponge and silky frosting, and somehow that matters more than any piped detail ever could.
Your Questions Answered
- → How do I achieve the blue ombré effect in the frosting?
Divide your buttercream into several portions and tint each with varying shades of blue, from deep ocean blue to pale aqua. Apply them in layers from darkest to lightest to create a smooth gradient.
- → What type of pan is best for this cake?
A 9x13-inch sheet cake pan works perfectly, providing an even bake and a good surface for decorating waves.
- → Can I prepare the cake and frosting ahead of time?
Yes, the cake can be baked and cooled in advance. The buttercream should be made fresh but can be stored chilled. Chill the cake between frosting layers for cleaner decorations.
- → How do I pipe the ocean wave decorations?
Use an offset spatula to spread the tinted buttercream in wave shapes. Swirl white buttercream on top to mimic sea foam using a piping bag with round or petal tips.
- → Are there any suggestions to enhance the cake’s flavor?
Add lemon zest to the vanilla sponge to introduce a subtle citrus brightness that complements the creamy buttercream.
- → Is this suitable for vegetarians?
Yes, this cake is vegetarian as it contains no meat or gelatin-based ingredients.