 Save
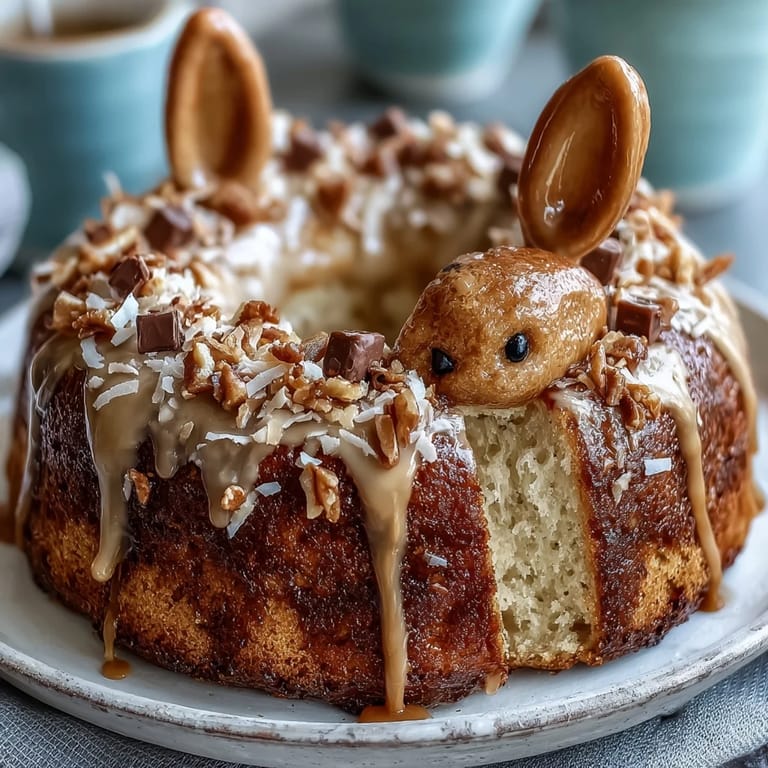
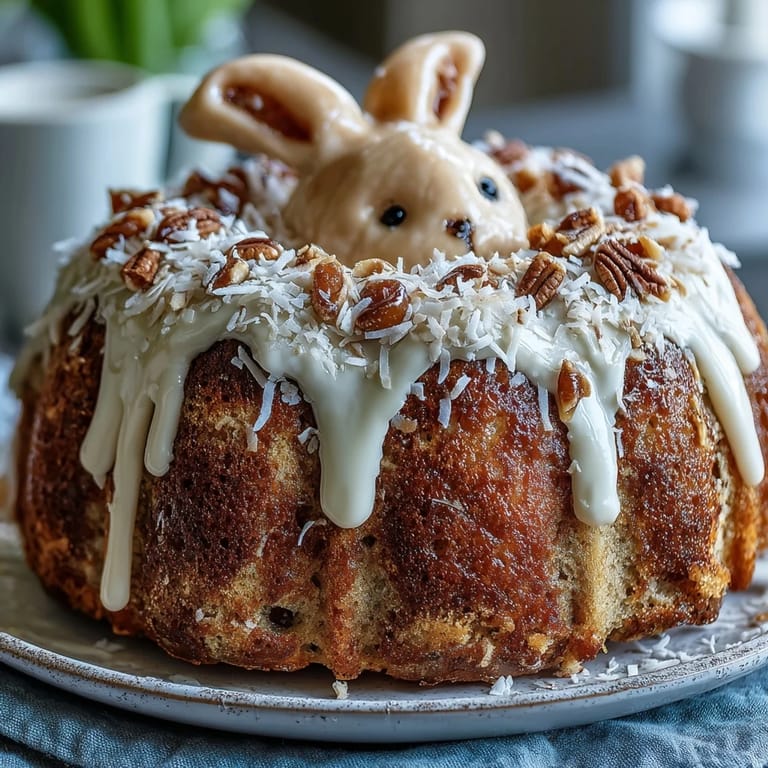
Save My daughter once asked if we could make a cake that looked like the Easter Bunny hopping through our kitchen. I laughed at first, thinking it sounded impossible, but then I found myself sketching bunny shapes on paper at midnight, imagining fluffy frosting and coconut fur. That spring, this whimsical cake became our Easter tradition, and honestly, watching her face light up when she saw those licorice whiskers made every careful cut and swirl of frosting worth it.
I still remember my sister's skeptical expression when I unveiled this cake at our family brunch—she was convinced the ears would flop over. But when that coconut caught the sunlight streaming through the windows, it looked like the bunny was genuinely glowing. She took three photos before anyone was even allowed to touch it, and that's when I knew this cake had become something beyond just dessert.
Ingredients
- All-purpose flour: The foundation of a tender cake that holds its shape when you're cutting those ears; don't skip the sifting for smoother batter.
- Baking powder: This is your rise and lift, so check the expiration date because stale baking powder will betray you mid-bake.
- Unsalted butter: Use room temperature butter—cold butter creates lumps and uneven mixing that shows up in the crumb.
- Granulated sugar: Beat this with butter for a full three minutes to aerate; rushing this step makes the cake dense.
- Eggs: Add them one at a time so they emulsify properly, and yes, room temperature eggs really do make a difference in texture.
- Vanilla extract: Pure vanilla transforms the cake from sweet to genuinely aromatic, and your kitchen will smell incredible.
- Whole milk: Alternating milk and flour prevents overmixing, which keeps the crumb tender and forgiving.
- Powdered sugar: Sift it before using to eliminate lumps that create grainy frosting.
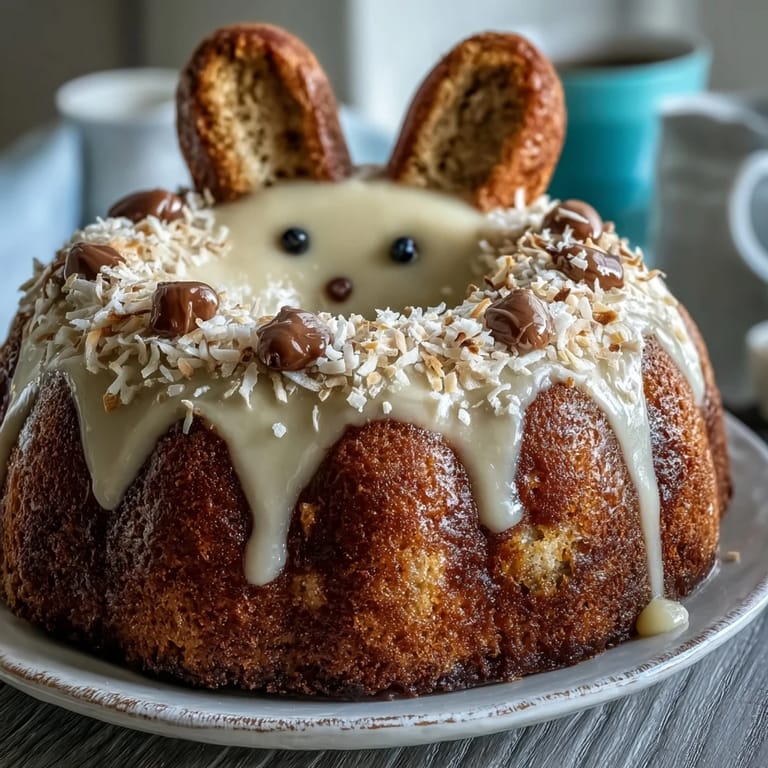
- Sweetened shredded coconut: This creates that signature fluffy, snowy exterior that looks magical when pressed onto frosting.
- Food coloring and decorations: The personality of your bunny lives here, so choose candies and colors that make you smile.
Tired of Takeout? 🥡
Get 10 meals you can make faster than delivery arrives. Seriously.
One email. No spam. Unsubscribe anytime.
Instructions
- Prep your pans like you mean it:
- Grease and flour two 9-inch round pans with intention—uneven pans create wonky cake layers that fight you during assembly. I learned this after one wobbly bunny threatened to topple during the big reveal.
- Whisk your dry ingredients together:
- Flour, baking powder, and salt need real whisking so the baking powder distributes evenly. This tiny step prevents pockets of dense cake hiding in your final bunny.
- Cream butter and sugar until fluffy:
- This takes about three full minutes of beating—don't rush it. You're incorporating air that creates a tender, light crumb that feels almost cloud-like.
- Add eggs one at a time with patience:
- Beat after each egg so they blend in smoothly. This takes maybe fifteen extra seconds per egg but transforms the cake's structure.
- Alternate wet and dry ingredients gently:
- Begin and end with flour, mixing just until combined—overmixing develops gluten and creates a tough cake. I use a spatula and fold gently rather than using the mixer for this final step.
- Divide and smooth the batter evenly:
- Use an offset spatula to level the tops so both layers bake evenly. Even layers mean your bunny won't tilt sideways after assembly.
- Bake until the toothpick test passes:
- Thirty to thirty-five minutes at 350°F—when the toothpick comes out clean, your cakes are done. Overbaking creates a drier cake that crumbles when you're cutting ears.
- Cool completely before any cutting:
- Ten minutes in the pan, then wire racks all the way to room temperature. A warm cake is structurally fragile and will shatter when you shape it.
- Make the frosting while cakes cool:
- Beat butter until creamy, then gradually add powdered sugar so you avoid lumps. The gradual addition of milk creates smoothness that spreads like silk.
- Tint a portion pink for details:
- Set aside half a cup and stir in pink food coloring until you reach a shade that feels cheerful. I sometimes make it deeper than I think because frosting lightens as it sits.
- Cut your cake into bunny shape:
- One round becomes the face, and the other round gets cut into two ear shapes and a bow tie piece. Take your time with a serrated knife and don't worry about perfection—you're about to cover everything in frosting anyway.
- Arrange the bunny on your serving board:
- Play around with placement before you commit any frosting. Sometimes rotating a piece slightly creates better proportions than you imagined.
- Apply a crumb coat and chill:
- This thin layer of frosting seals in crumbs so your final frosting looks pristine. Fifteen minutes in the fridge lets it firm up enough for the next layer.
- Frost generously and press on the coconut:
- Use an offset spatula to apply frosting, then immediately press shredded coconut into it while still soft. Work in sections so the frosting doesn't dry before the coconut adheres.
- Decorate the face with confidence:
- Pink frosting for inner ears and nose, jelly beans for eyes, licorice for whiskers, marshmallows for cheeks and tail. This is where your bunny gets personality.
 Save
Save There's something magical about watching someone's expression when they realize the cake they're looking at is actually edible. My nephew stared at this bunny for a full minute before asking if it was okay to eat something that cute, and that moment felt like the entire purpose of the recipe.
The Secret to Perfect Cake Layers
Temperature control is underrated in baking. Room temperature ingredients blend together more evenly, creating a batter that bakes uniformly without dry spots or dense pockets. I started keeping my eggs and butter on the counter before I even preheat the oven, and my cakes became noticeably more tender and consistent.
Decorating Like It's Playtime
Perfection isn't the goal here—personality is. Your bunny's whiskers might be slightly crooked, and the marshmallow tail might tilt left instead of sitting centered, but those quirks are what make it memorable. I've seen elaborate cakes in magazines, but I remember the wonky homemade ones that someone made with joy.
Making This Cake Your Own
This bunny welcomes adaptation and creative spirit. Toast your coconut in a dry skillet for a minute to deepen the flavor, or swirl in a hint of almond extract to the frosting for subtle sophistication. Some years we use cream cheese frosting for tanginess, other years we keep it simple and classic.
- Toasted coconut adds nuttiness and crunch that regular coconut doesn't deliver.
- Cream cheese frosting creates a sophisticated flavor that adults especially appreciate.
- You can bake this cake up to two days ahead, wrapped tightly, and assemble it fresh on Easter morning.
 Save
Save This cake is meant to be shared at tables where people linger and laugh. The frosting might melt slightly on a warm spring day, the coconut might shed a little onto plates, and someone will definitely sneak the marshmallow cheek before serving—and that's exactly how it should be.
Your Questions Answered
- → How do I shape the cake into a bunny?
Use two round cake layers; one serves as the face, the other is cut to form ears and a bow tie. Assemble pieces on a large board, securing with frosting for stability.
- → Can I prepare the cake layers ahead of time?
Yes, cake layers can be baked a day in advance and stored tightly wrapped to maintain moisture before assembly.
- → What alternatives exist for the coconut frosting?
Substitute shredded coconut with toasted coconut for extra flavor or opt for cream cheese frosting for a tangy twist.
- → How is the pink color achieved in the decorations?
Set aside a portion of white frosting and tint it with pink food coloring to highlight bunny ears and nose.
- → Are there recommended beverage pairings?
Pair the cake with a light Moscato or lemonade to complement the sweet and creamy flavors for a festive touch.