 Save
Save The first time I attempted this cake, my kitchen looked like a crime scene—red batter everywhere, chocolate fingerprints on every surface, and a Betty Boop silhouette that snapped in half right when I tried to transfer it. My daughter laughed so hard she couldnt breathe, then proceeded to eat the broken chocolate pieces while I frantically piped a second one. Sometimes the disasters are the ones we talk about for years.
I made this for my best friends thirtieth birthday, surrounded by half-inflated balloons and a kitchen that smelled like cocoa and vanilla. She had mentioned loving Betty Boop as a kid, something about watching those old cartoons with her grandmother on Sunday mornings. When she saw the silhouette on top, she actually got teary, which is saying something for someone who claims she doesnt like sweets.
Ingredients
- Cake flour: Lower protein than all-purpose, giving you that tender, velvety crumb that practically melts
- Unsweetened cocoa powder: Just enough to deepen the red without turning it brown—natural cocoa keeps it bright
- Buttermilk: The acidity reacts with baking soda for extra lift and adds a subtle tang that balances sweetness
- Red gel coloring: Gel is concentrated, so you wont need to add enough liquid to throw off the batter chemistry
- Cream cheese: Full fat, room temperature—cold cream cheese creates lumps that no amount of beating can fix
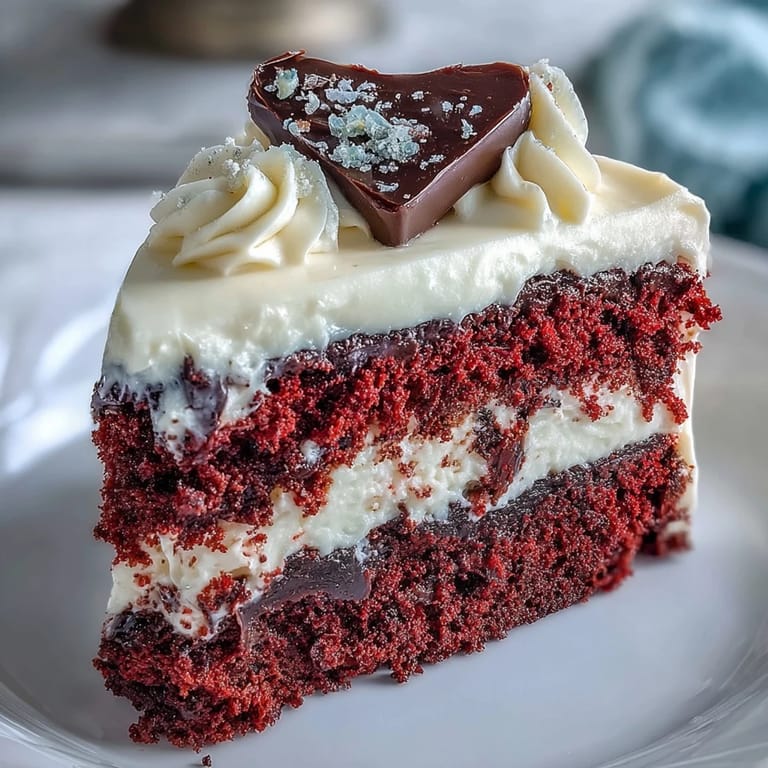
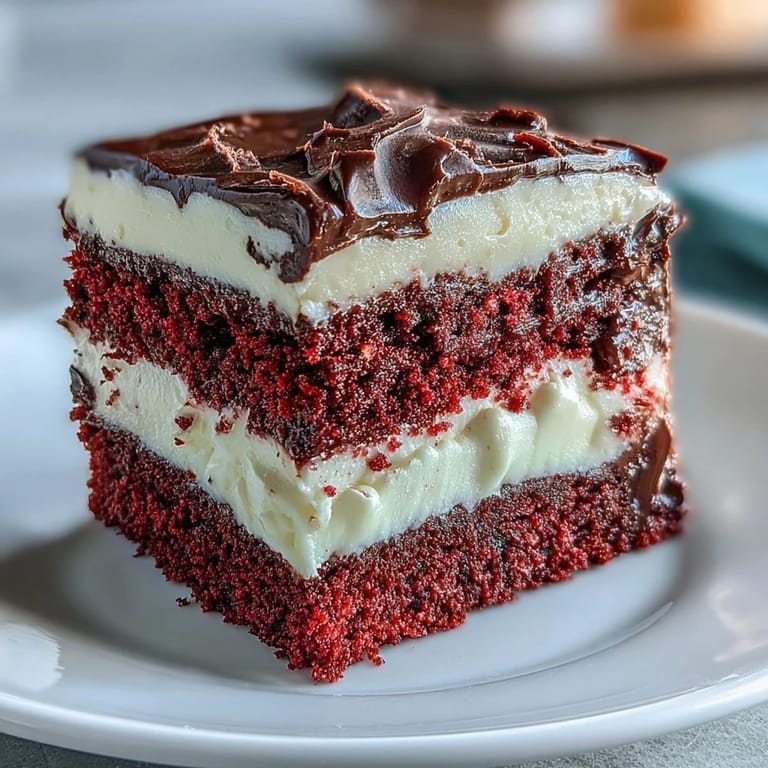
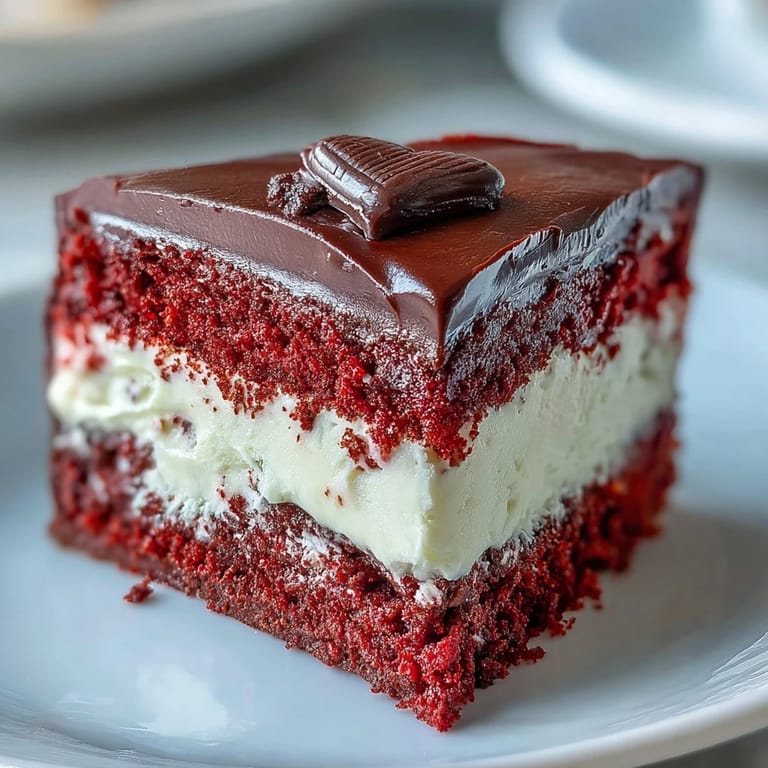
- Dark chocolate: The bitterness against sweet frosting is exactly the contrast this cake needs
Tired of Takeout? 🥡
Get 10 meals you can make faster than delivery arrives. Seriously.
One email. No spam. Unsubscribe anytime.
Instructions
- Prep your heart pans:
- Rub butter into every nook and cranny of those heart shapes, line the bottoms with parchment, and set your oven to 350°F.
- Whisk the dry team:
- Sift together cake flour, cocoa, baking powder, baking soda, and salt in a medium bowl.
- Cream butter and sugar:
- Beat butter for a full minute until creamy, then gradually add sugar and let it go for another 2 to 3 minutes until its pale and fluffy.
- Add eggs one by one:
- Drop in each egg, beating just until blended—scrape the bowl down so nothing gets stuck to the sides.
- Make it red:
- Pour in red gel, vanilla, and white vinegar, mixing until the batter turns that shocking, perfect crimson.
- Alternate wet and dry:
- With mixer on low, add one-third of the dry ingredients, then half the buttermilk, repeating until everything is just combined.
- The fizz moment:
- Mix vinegar with baking soda in a small cup, fold gently into the batter—watch it foam slightly, thats your lift happening.
- Bake until done:
- Divide batter between pans, smooth tops, and bake 25 to 30 minutes until a toothpick comes out clean.
- Cool completely:
- Let cakes rest in pans for 10 minutes, then turn onto wire racks—warm cake melts frosting into a sad puddle.
- Make the frosting:
- Beat room-temperature cream cheese and butter until smooth, then gradually add powdered sugar, salt, and vanilla.
- Assemble the layers:
- Level domed cakes if needed, spread frosting between layers, and chill for 15 minutes to set the crumb coat.
- Frost and swirl:
- Apply a thin crumb coat, chill again, then finish with a final layer—use your offset spatula to create swoops or keep it smooth.
- Create the silhouette:
- Place your Betty Boop stencil under parchment, trace with melted dark chocolate, and let set until firm.
- Place the masterpiece:
- Carefully peel the chocolate from parchment and center it on your cake—press gently so it sticks.
- Final touches:
- Add frosting rosettes, edible glitter, or red pearls around the edges, then chill 30 minutes before slicing.
 Save
Save Last Valentine's Day, I made this for my partner who had never even heard of Betty Boop. By the time we finished dessert, they were scrolling through vintage cartoons on their phone, completely charmed by the retro heart on their plate. Food has this way of connecting us to things we never knew we needed.
Getting That Silhouette Right
Print your stencil at the exact size you want, then tape it to your counter with parchment paper on top. I learned the hard way that slippery parchment shifts mid-tracing, creating a wobbly Betty that looks like she had a few too many. Dark chocolate works better than candy melts for fine details—it holds its shape and snaps clean when set.
Frosting Like a Pro
After applying your final layer of frosting, let it crust for about 10 minutes, then drape a piece of parchment paper over the cake and gently smooth with your hand. The parchment picks up any imperfections and creates that glass-like finish you see in bakery windows. Warm your offset spatula under hot water, wipe dry, and make one final pass for extra polish.
Make-Ahead Magic
The cake layers can be wrapped tightly in plastic and frozen for up to a week—thaw them in the fridge overnight before frosting. Your chocolate silhouette can be made days ahead and stored between sheets of parchment in a cool, dry place. Frosting holds in the fridge for three days, but bring it to room temperature and re-whip before using.
- Level your cakes while theyre still slightly warm for easier cutting
- Use a rotating cake stand for even frosting application
- Run your knife under hot water and wipe dry between slices for clean cuts
 Save
Save Hope this cake brings someone as much joy as it brought me watching my daughter sneak chocolate scraps off the counter. Happy baking.
Your Questions Answered
- → Can I use regular all-purpose flour instead of cake flour?
Yes, but cake flour creates a lighter, more tender crumb. If using all-purpose flour, remove 2 tablespoons per cup and replace with cornstarch to mimic cake flour's lower protein content.
- → How do I prevent the chocolate silhouette from breaking?
Work with chocolate at room temperature after it has fully set. Use a thin layer of chocolate on parchment, and peel slowly. If it's too brittle, the chocolate may be too cold; let it warm slightly before handling.
- → Can I make this cake ahead of time?
Yes. Bake and cool the cake layers, wrap tightly in plastic wrap, and refrigerate for up to 2 days or freeze for up to 1 month. Frost once thawed and brought to room temperature.
- → Why does the batter need vinegar and baking soda?
The vinegar reacts with baking soda to create carbon dioxide bubbles, which lighten the cake's texture and enhance the red color by balancing the pH of the cocoa powder.
- → What if I don't have heart-shaped pans?
Use two 9-inch round pans and carve them into heart shapes after baking and cooling. Alternatively, bake in rounds and decorate with heart-themed toppings for a similar effect.
- → How can I achieve a smoother frosting finish?
Apply a thin crumb coat first and chill. For the final layer, use a warm offset spatula dipped in hot water and wiped dry. Smooth in long, even strokes while rotating the cake stand.