Save
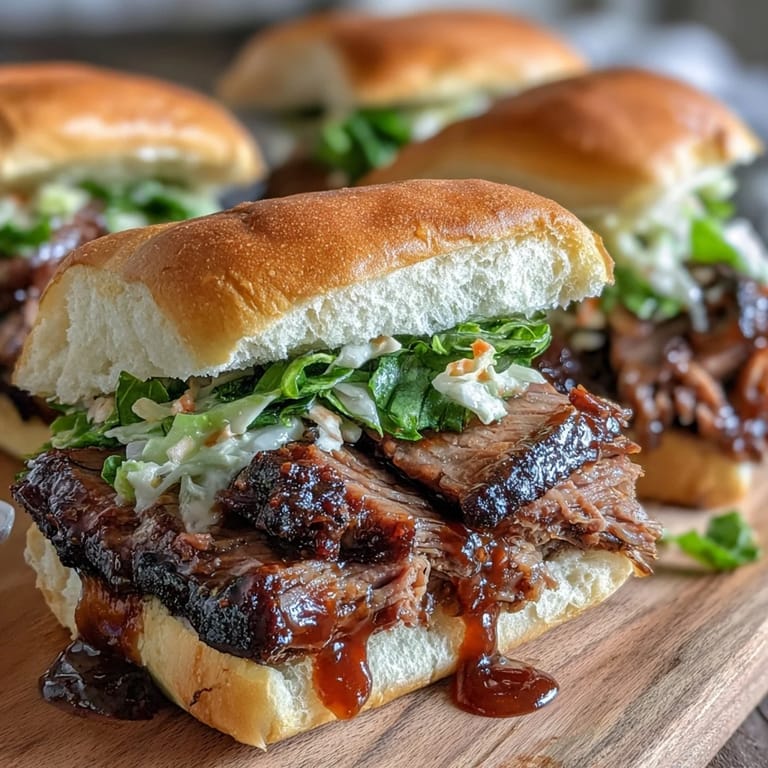
Save My sister called me three weeks before her baby shower in a mild panic—she wanted food that felt celebratory but wouldn't tie her to the kitchen all day. I suggested these BBQ brisket sliders, and honestly, watching her face light up when she realized she could make them ahead and just reheat changed everything. There's something about a slider that makes people happy; it feels indulgent but approachable, smoky but not intimidating. The first batch I made for her came out of the oven with this deep mahogany crust, and the smell alone had guests asking questions before they even saw the table.
I'll never forget my cousin sneaking into the kitchen mid-party to snag a third slider when he thought no one was looking. He came back out with BBQ sauce on his sleeve, grinning like he'd done something he shouldn't, and that's when I knew these had crossed from appetizer into something people actually craved. The slaw kept everything bright and tangy so nothing felt heavy, even after eating two or three of them.
Ingredients
- Beef brisket, trimmed (2 lbs): This cut needs time and moisture to shine—trimming the fat yourself saves money and gives you control over the final texture.
- Smoked paprika: The real secret to that authentic BBQ depth; don't skip it or substitute regular paprika, the smoke is everything.
- Brown sugar: Creates a subtle crust and balances the spice rub with just enough sweetness.
- Kosher salt, black pepper, garlic powder, onion powder: This combination builds layers of flavor that the long cooking time amplifies beautifully.
- Cayenne pepper (optional): I use it when I want a whisper of heat without making it spicy for kids at the party.
- Olive oil: Helps the spices cling to the meat and prevents sticking in the pan.
- Beef broth (1 cup): Keeps the brisket moist during the long roast and creates a savory base for the pan.
- BBQ sauce (1 cup): Homemade tastes incredible, but a quality store-bought sauce works when time is tight—just taste it first to make sure it's the flavor you want.
- Green cabbage and carrots: The slaw cuts through the richness and keeps each bite feeling fresh; shred them finely so they integrate well into each slider.
- Mayonnaise, apple cider vinegar, honey: This trio creates a creamy-tangy dressing that complements smoky meat without overpowering it.
- Slider buns: Soft, buttery buns make the slider—cheap ones fall apart when you add warm brisket, so invest in decent ones.
Tired of Takeout? 🥡
Get 10 meals you can make faster than delivery arrives. Seriously.
One email. No spam. Unsubscribe anytime.
Instructions
- Preheat and prepare your workspace:
- Set your oven to 300°F and let it come to temperature while you gather everything—this slow, gentle heat is what transforms tough brisket into something spoon-tender.
- Build your spice rub:
- Mix paprika, brown sugar, salt, pepper, garlic powder, onion powder, and cayenne in a small bowl; the aroma alone hints at what's coming.
- Season the brisket generously:
- Rub the spice blend all over the meat with your hands, then add a thin coating of olive oil so everything adheres and creates that beautiful mahogany exterior.
- Nestle the brisket into the roasting pan:
- Pour beef broth around (not over) the meat, then cover tightly with foil—you're creating a gentle steam environment that braises the brisket low and slow.
- Let time do the heavy lifting:
- Roast for 4 to 4.5 hours; you'll know it's ready when a fork slides through with almost no resistance and the kitchen smells like a BBQ joint. Let it rest 15 minutes before slicing.
- Make the slaw while the brisket cooks:
- Toss shredded cabbage and carrots with mayonnaise, vinegar, and honey; taste and adjust salt and pepper until it feels balanced—you want bright acidity that won't get lost under smoky meat.
- Prepare your brisket for assembly:
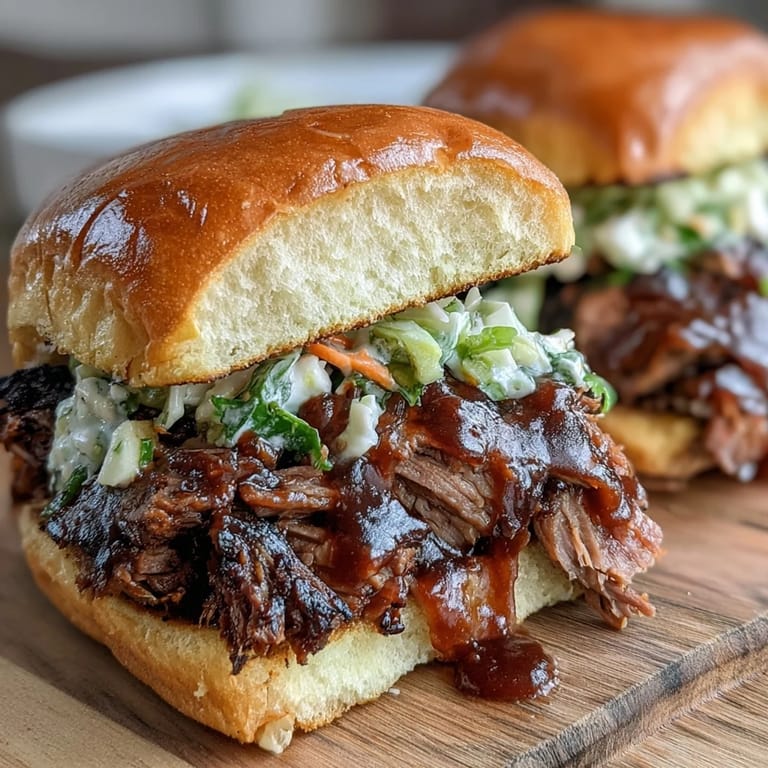
- Slice or shred the rested brisket, then toss it with BBQ sauce until every piece glistens; this is where flavor really concentrates.
- Toast your buns lightly (optional but worth it):
- Brush with melted butter and char them lightly in a skillet so they hold up to the warm, saucy filling and add a touch of richness.
- Build each slider with intention:
- Layer brisket on the bottom bun, crown with a small handful of slaw, add pickles if you like the crunch and tang, then place the top bun on gently—let the filling speak for itself.
 Save
Save What struck me most was how this meal became less about the food and more about the moment—my sister's friends gathered around the slider table, talking and laughing, and for those few hours the kitchen felt like the center of something warm and real. That's when I realized these little sandwiches had done what they were meant to do.
Why This Works for Any Celebration
Sliders sit at that perfect intersection of elegant and casual; they feel special enough for a baby shower or backyard wedding, but approachable enough that guests don't feel awkward eating them. The portions are forgiving too—if someone wants to try three, they can without feeling like they've overdone it. Plus, the make-ahead element means you're actually present at your own party instead of stress-cooking in the background.
The Slaw Is Your Secret Weapon
Most people think of slaw as an afterthought, but here it's the balance that keeps the whole slider from feeling one-note. The tang and crunch wake up your palate between bites, and the cool vegetable brightness prevents the rich brisket from sitting heavy. I once made these sliders without bothering with slaw (lazy moment), and they felt flat—the slaw isn't optional, it's essential to the whole experience.
Storage, Reheating, and Other Practical Wisdom
The brisket keeps beautifully in the refrigerator for up to three days, and you can even freeze it for up to a month if you want to get ahead for a future event. The slaw is best made fresh or within a few hours of serving so the cabbage stays crisp. When you're ready to assemble, reheat the brisket gently in a covered skillet over medium-low heat with a splash of broth, stirring occasionally, until it's warm through and tender again.
- Toast your buns right before assembly so they're warm and slightly crispy but not so toasted that they crack when you bite into them.
- Set up an assembly line if you're making all twelve at once—it moves faster and keeps everything organized.
- Keep extra napkins within arm's reach because these are meant to be eaten with joy and a little BBQ sauce on your chin.
 Save
Save These sliders have a way of becoming the dish people ask you to make again, the one that somehow turns an ordinary gathering into a memory. That's the quiet magic of good food made with intention.
Your Questions Answered
- → How long should the brisket be cooked?
Roast the brisket at 300°F for 4 to 4½ hours until fork-tender to ensure a juicy, flavorful texture.
- → Can I prepare the slaw in advance?
Yes, the slaw can be mixed and chilled ahead of time to allow the flavors to meld and to save assembly time.
- → What is the best way to season the brisket?
A dry rub of smoked paprika, brown sugar, kosher salt, black pepper, garlic and onion powder, plus optional cayenne, creates a balanced smoky and slightly sweet crust.
- → Is it necessary to toast the slider buns?
Toasting buns with melted butter is optional but enhances texture and adds a subtle richness to the sliders.
- → Can the brisket be reheated without drying out?
Reheat gently with a splash of beef broth to retain moisture and tenderness when warming leftovers.
- → Are there recommended side dishes to accompany these sliders?
Potato chips or sweet potato fries complement the smoky and tangy flavors, adding a satisfying crunch on the side.